Efficiently Transmitting Cookies from Backend to Frontend in a MERN Stack during Production Deployment


Table of contents
The Problem:
JWT Token authentication is a widely employed technique for user login. Tokens are typically assigned a specific lifespan based on enterprise requirements. During the development stage, seamless operation is achieved by sending requests between a frontend (ReactJS) and a backend (NodeJS, ExpressJS, MongoDB) hosted on localhost. However, in the production stage, attempting to retrieve the token from the backend may fail to set it in the browser, leading to Unauthorized errors when accessing services. Fortunately, this issue can be resolved by following a few straightforward steps.
The Solution:
During the production stage, it is crucial to remember to include the
"secure:true"option within the parameters of thejwt.sign()method when working on the backend. Here is a sample code snippet that you can utilize for reference. Additionally, ensure that you appropriately configure theoptionsfor the JSON Web Token (JWT).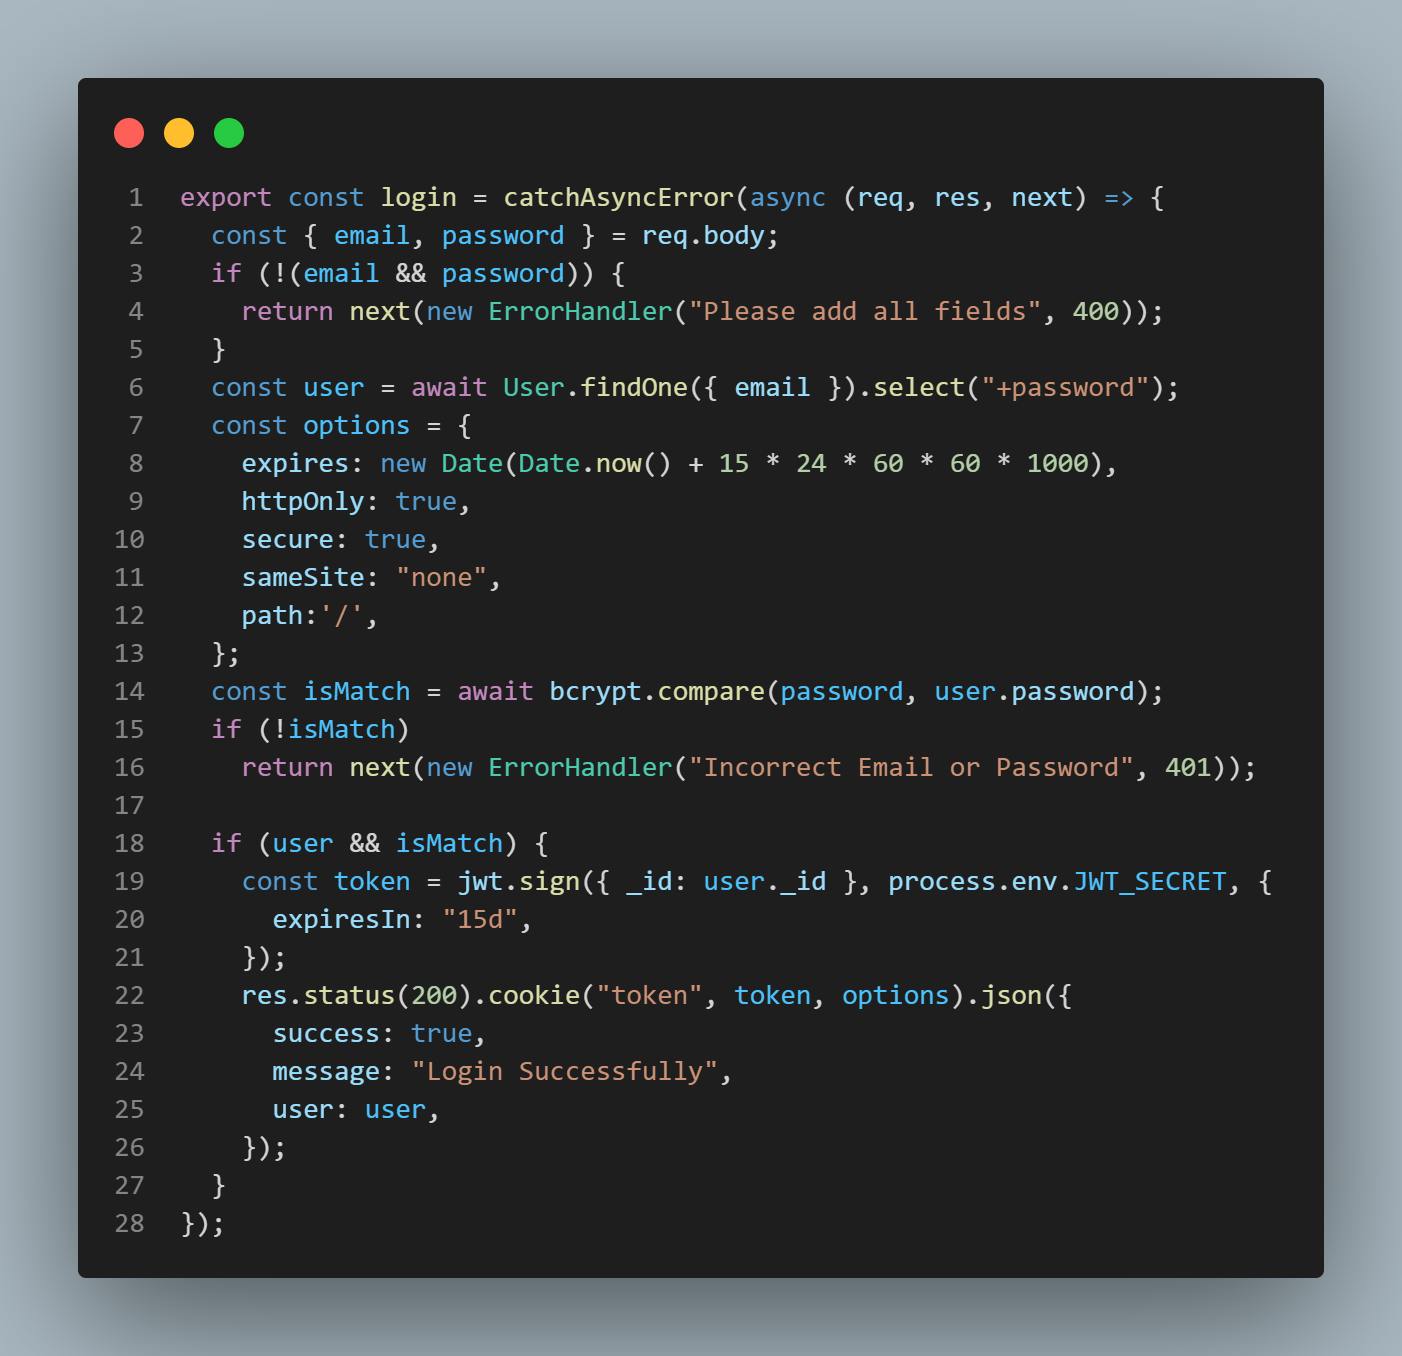
Ensure that the frontend incorporates the appropriate
headersand includes the"withCredentials"property when transmitting data. Here's a code snippet to illustrate this:
When retrieving data from
req.body,the header is set to"Content-Type": "application/json".However, if you're obtaining data from a form, it should be set to"Content-Type":"multipart/form-data".const { data } = await axios.post(`${server}/register`, formData, { headers: { "Content-type": "multipart/form-data", }, withCredentials: true, });
Now, let's address the final essential aspect of this blog. Imagine you are in the process of deploying the frontend on Netlify and the backend on Render. If you're unfamiliar with the deployment procedure on Netlify, I recommend referring to this blog. Similarly, for the backend deployment, you can find helpful information in this blog.
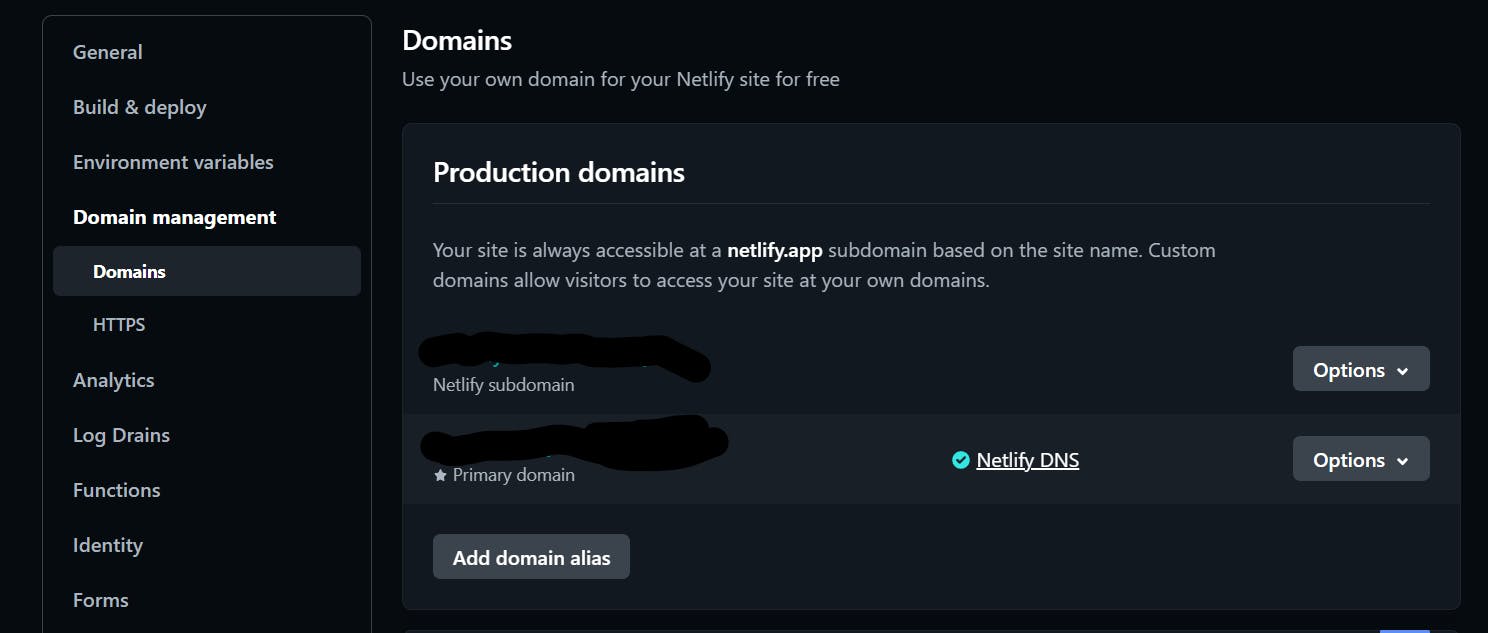
To configure your subdomain in Netlify, navigate to the Domain section of your site settings and select your frontend GitHub repository. This step allows you to seamlessly set up your subdomain if you already have one.
To access the Render dashboard, navigate to the Settings section and scroll down to find the Custom Domains option. Here, you can add your domain. For example, in my case, the frontend is hosted on "academy.name.com" while the backend is on "academybackend.name.com". It may take some time for Render to associate the domain with your backend. Once that's done, you need to make changes to the code where your .env variables are present. Additionally, remember to include the environment variables in Render.
In simple words,
Despite numerous attempts to find a solution, the browser failed to set the cookie. However, the breakthrough came when I decided to change the domain name. In the production stage, I had deployed my API as server.mydomain.com, while my frontend resided on anotherdomain.app. I had properly configured CORS, allowing smooth communication between the two domains. Although I could successfully send requests to "open" routes, the browser disregarded the cookie when attempting to log in. Fortunately, once I switched the frontend to mydomain.com, the cookie was effortlessly set and recognized by the browser.
That’s all for this post. I hope you found it useful!